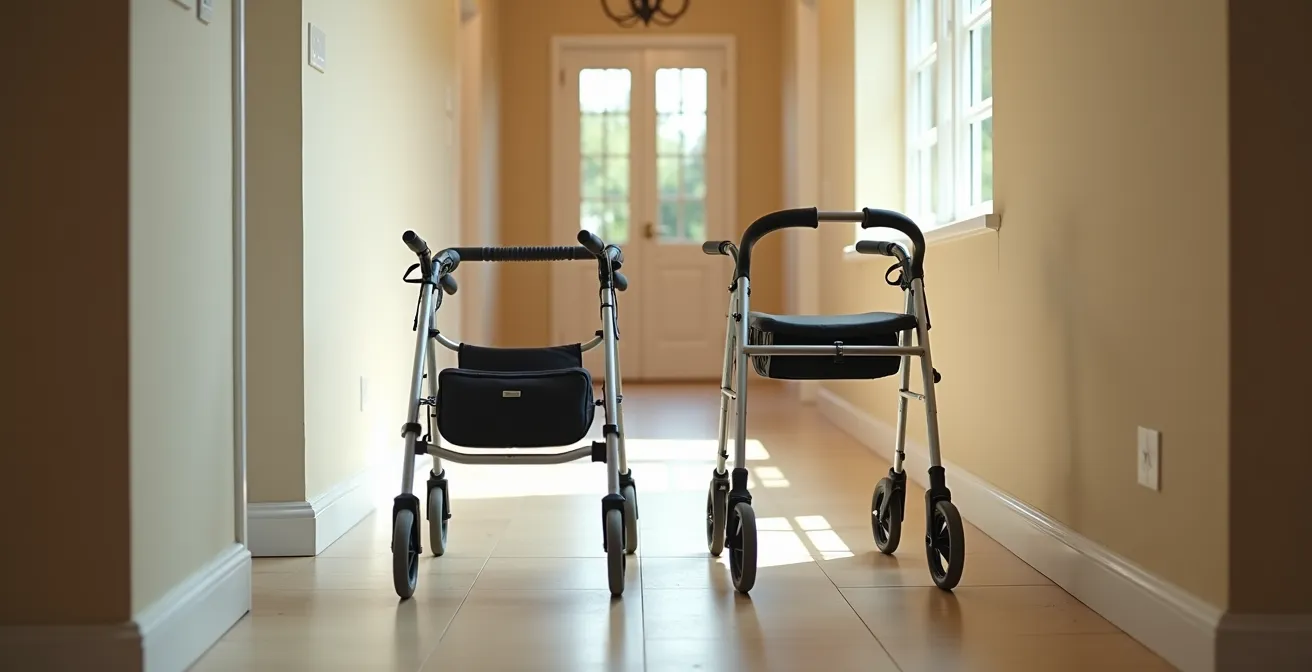
Choosing a rollator for a small apartment goes far beyond a simple width measurement; it’s about mastering the spatial dynamics of your home.
- A 3-wheel rollator’s superior turning radius often makes it better for tight corners, even if a 4-wheel model technically fits through the door.
- Wheel size is critical: 8-inch wheels offer the best balance for navigating indoor thresholds and cracked outdoor sidewalks without sacrificing too much maneuverability.
Recommendation: Prioritize a rollator’s turning radius and user posture over its static width to ensure true, frustration-free mobility in confined living spaces.
Choosing a rollator often starts with a single, frustrating moment: the jarring stop as the frame gets wedged in a doorway. For seniors living in smaller apartments or homes with narrow passages, this isn’t just an inconvenience; it’s a daily barrier to independence. The common advice is to simply measure your doorways and buy a walker that’s narrower. But this approach overlooks a crucial reality. True mobility isn’t just about fitting through an opening; it’s about the fluid movement through a complete living environment—from the kitchen to the bathroom, around furniture, and over door sills.
While the debate often pits 3-wheel models against 4-wheel versions, the answer isn’t a simple numbers game. Factors like the ergonomic footprint of braking systems, the stability of the frame when loaded with accessories, and even the user’s own posture contribute to what can be called the ‘spatial dynamics’ of a rollator. This guide moves beyond basic measurements to explore these nuanced, real-world factors. We will deconstruct how a rollator truly interacts with a confined space, empowering you to select a model that doesn’t just fit, but flows with you through your home.
This article provides a detailed breakdown of the critical features that determine a rollator’s suitability for tight spaces. By exploring each element, from braking systems to wheel performance, you will gain a comprehensive understanding to make an informed and confident choice for your mobility needs.
Summary: Navigating the Choice Between 3 and 4-Wheel Rollators for Tight Spaces
- Why Cable Brakes Are Harder for Arthritic Hands to Operate?
- How to Fold and Load a Rollator into a Car Trunk Alone?
- 6-Inch vs. 8-Inch Wheels: Which Handles Cracked Sidewalks Better?
- The ‘Shopping Cart’ Slump That Causes Back Pain for Walker Users
- Where to Attach the Cup Holder to Avoid Tipping the Walker?
- How to Use Rideshare Apps Specifically Designed for Seniors?
- Why Standard 30-Inch Doors Block Access for Power Wheelchairs?
- How to Choose a Power Wheelchair Battery for All-Day Outdoor Independence?
Why Cable Brakes Are Harder for Arthritic Hands to Operate?
A rollator’s braking system is a primary point of interaction, yet it’s often overlooked until it becomes a source of pain or difficulty. Standard loop-lock handbrakes, similar to those on a bicycle, require a certain amount of grip strength and dexterity to engage securely. For individuals with arthritis, neuropathy, or weakened hand strength, repeatedly squeezing these levers can be challenging and painful. This difficulty compromises not only comfort but, more importantly, safety. If a user cannot confidently and quickly apply the brakes, their risk of a fall increases, especially on ramps or uneven surfaces.
The ergonomic footprint of the braking system is a key component of a rollator’s overall usability. The force and motion required to operate the brakes must match the user’s physical capabilities. Fortunately, manufacturers and therapists have developed alternatives for those who struggle with conventional cable brakes. These systems are designed to leverage body weight or different muscle groups, reducing the strain on sensitive hands and joints.
Understanding these options is crucial for selecting a truly functional mobility aid. Some alternative systems include:
- Push-down weight-activated brakes: These engage simply by applying downward pressure on the rollator’s frame, eliminating the need to squeeze handles.
- Reverse brake systems: These are locked by default and only release when the user squeezes the handles, providing a “fail-safe” for those who may forget to apply brakes.
- Ergonomic grip covers: Aftermarket additions that can be fitted over standard handles to provide a larger, softer surface area, reducing the force required to grip.
An Occupational Therapist can provide professional recommendations and even help with modifications. It’s also worth noting that many premium rollators with specialized brakes may be covered by insurance programs with a doctor’s prescription, making safety more accessible.
How to Fold and Load a Rollator into a Car Trunk Alone?
A rollator offers freedom, but that freedom is limited if you cannot transport it independently. The ability for “solo-handling”—folding and loading the device into a vehicle without assistance—is a critical aspect of its design, especially for seniors who live alone. The weight, folding mechanism, and folded dimensions of a rollator determine how manageable this task is. Lighter frames made of aluminum or carbon fiber are significantly easier to lift than steel models. Similarly, a simple, one-touch folding mechanism is preferable to a complex system requiring multiple steps or significant force.
The folding style also impacts spatial dynamics during transport. Side-fold models collapse horizontally, much like a stroller, and can often stand on their own when folded, which is a major advantage. Up-fold models collapse vertically and tend to be more compact but may not be self-standing. Three-wheel rollators are generally lighter and fold into a more compact shape, making them a strong choice for users who prioritize ease of transport and solo-handling.

To safely load a rollator, technique is just as important as the device’s design. The “Bumper Pivot” is a highly effective method that minimizes strain on the back. It involves resting one side of the folded rollator on the lip of the trunk and then pivoting the rest of the device inside, rather than lifting the entire weight at once. Always lock the brakes before you begin folding to prevent it from rolling away.
Your Action Plan: Loading a Rollator into a Car Safely
- Secure and Strip: Lock the brakes firmly to prevent any movement. Remove all loose items like bags, cup holders, or personal belongings from the basket and frame.
- Activate Folding Mechanism: Locate and press the folding mechanism. This could be a single button, a pull-strap on the seat, or two buttons on the frame, depending on your model.
- Confirm Compactness: Ensure the rollator is fully folded and, if applicable, that the frame lock has engaged to prevent it from reopening during the lift.
- Execute the ‘Bumper Pivot’: Stand beside the trunk, bend your knees, and lift the rollator to rest one set of wheels on the trunk’s edge. Slide and pivot the rest of the unit into the car.
- Check Unfolding Lock: When removing the rollator, listen or feel for the ‘click’ that confirms the frame is securely locked in its open position before placing any weight on it.
6-Inch vs. 8-Inch Wheels: Which Handles Cracked Sidewalks Better?
The wheels are a rollator’s direct connection to the world, and their size dramatically influences performance, especially when transitioning between different surfaces. This concept of “threshold navigation” is vital for users in small apartments who frequently move from indoor flooring to outdoor pavement. While smaller 6-inch wheels offer excellent maneuverability in tight indoor spaces like narrow hallways and bathrooms, they tend to struggle with outdoor imperfections. A small crack in the sidewalk, a raised door sill, or the edge of a rug can be enough to stop them abruptly, creating a tipping hazard.
In contrast, larger 8-inch wheels are the superior choice for all-around use. Their larger diameter allows them to roll over common obstacles like cracked sidewalks, small curbs, and uneven terrain with greater ease and stability. This provides a smoother, safer ride and gives the user more confidence when venturing outside. While they may have a slightly wider turning radius than 6-inch wheels, the safety benefit for mixed indoor/outdoor use is a significant trade-off. For purely outdoor or rural use, even larger 10-inch wheels are available, but these are often too cumbersome for indoor navigation.
The following table provides a clear comparison of how wheel size correlates with the ideal environment and performance characteristics, drawing on insights from mobility experts.
| Wheel Size | Best Environment | Advantages | Limitations |
|---|---|---|---|
| 6-inch wheels | Indoor use, smooth surfaces | More maneuverable in tight spaces, lighter weight | Struggle with sidewalk cracks and uneven terrain |
| 8-inch wheels | Outdoor use, rough terrain | Roll over obstacles easier, better stability on cracks | Wider turning radius, may be harder in narrow hallways |
| 10-inch wheels | All-terrain, grass, gravel | Best for outdoor walks, smooth ride over bumps | Heavier, less suitable for indoor navigation |
Case Study: Drive Nitro Rollator Performance
User feedback on the popular Drive Nitro rollator highlights the importance of wheel size. According to a discussion on an online senior care forum, users found its larger 8-inch front wheels performed well across various surfaces, including thick apartment carpeting and outdoor pavement. This made it a versatile choice for those needing to navigate between indoor and outdoor environments seamlessly. The consensus was that while no rollator is perfect for very rough terrain, larger wheels are essential for everyday safety and convenience.
The ‘Shopping Cart’ Slump That Causes Back Pain for Walker Users
One of the most common mistakes in using a rollator is poor posture, often called the “shopping cart slump.” This occurs when the user hunches over and pushes the rollator far out in front of them, similar to how one pushes a grocery cart. This posture is not only inefficient but can also lead to significant back, neck, and shoulder pain. It shifts the user’s center of gravity forward, placing undue strain on the spine and reducing the support the rollator is designed to provide. The root cause is often improperly adjusted handle height or a subconscious fear of tripping over the walker.
Correct posture involves walking *inside* the rollator’s frame, not behind it. The handles should be adjusted to a height that allows the user to stand up straight with a slight, comfortable bend in their elbows—typically a 15-degree angle. The hips should be aligned with the handles, bringing the body’s support base within the rollator’s wheelbase. This upright position allows the rollator to properly support the user’s weight, improves balance, and promotes a more natural gait.
For individuals with chronic back issues or a tendency to slump, an upright walker with forearm supports can be a transformative solution. These “stand-up” rollators encourage a fully erect posture by providing support platforms for the forearms, taking the load off the wrists and lower back entirely. Regardless of the model, practicing good posture is a continuous effort. Taking frequent breaks on the built-in seat can help reset posture and prevent fatigue from setting in.
To avoid the painful slump, focus on these corrective techniques:
- Walk Tall: Keep your body within the walker’s frame, bringing your hips forward until they are in line with the handles.
- Adjust Handle Height: Ensure handles are at wrist level when you stand straight with your arms at your sides. Your elbows should be slightly bent when gripping.
- Strengthen Your Core: Simple seated core-strengthening exercises can improve overall postural stability.
- Take Seated Breaks: Use the integrated seat not just for rest, but as a chance to consciously reset your posture and straighten your spine.
Where to Attach the Cup Holder to Avoid Tipping the Walker?
Accessories like cup holders, bags, and cane holders add immense convenience to a rollator, but their placement can have a profound impact on the device’s stability. Every rollator has a ‘stability center’—an optimal center of gravity based on its wheel configuration. Attaching heavy or off-balance items, especially high up or outside the wheelbase, can shift this center and dramatically increase the risk of tipping. This is particularly true for lighter 3-wheel models, which have a smaller base of support.
A full water bottle or a heavy purse can act as a lever, making the rollator unstable during turns or on uneven ground. To prevent this, it’s crucial to understand the “safe zones” for accessory placement. As a rule, heavier items should always be placed as low and as centered as possible. The built-in storage basket, typically located under the seat, is the ideal location for carrying anything with significant weight, such as groceries or a handbag.

For lighter items like a cup holder, placement is still key. Attaching it high on the handlebars is the most convenient but also the most dangerous location. A much safer option is to mount it lower on one of the front down tubes, inside the wheelbase. This keeps the weight low and contained within the rollator’s base of support. Always test the stability with a full water bottle in the cup holder before heading out for the first time by gently pushing the rollator from different angles to see if it feels tippy.
A simple zoning system can help visualize safe attachment points:
- Green Zone (Safest): Low on the frame and inside the wheelbase. This is the best spot for any added weight.
- Yellow Zone (Use with Caution): Mid-height on the frame, centered between the front and back wheels.
- Red Zone (High Risk): High on the handlebars or anywhere outside the edges of the wheelbase. Avoid placing anything heavy here.
How to Use Rideshare Apps Specifically Designed for Seniors?
Mobility extends beyond the walls of your home. For many seniors, rideshare services like Uber and Lyft have become a lifeline for appointments, shopping, and social outings. However, the standard app-based interface can be a technological barrier for some. Furthermore, coordinating a ride when you have a mobility aid like a rollator requires clear communication with the driver. Fortunately, the industry has evolved to address these specific needs, offering specialized services and features that make ridesharing more accessible.
Services like GoGoGrandparent act as a concierge layer over existing rideshare platforms. Instead of navigating a smartphone app, seniors can make a simple phone call to a live operator to request a ride. They can have their mobility aid requirements noted on their profile, ensuring the dispatched driver is prepared to accommodate a folding rollator in the trunk. This service brilliantly bridges the technology gap, making on-demand transportation available to everyone, regardless of their comfort with smartphones.
For those who are comfortable using apps, platforms like Uber offer features such as Uber Assist. This option connects riders with drivers who are trained to provide additional assistance and can accommodate folding walkers and wheelchairs. When booking, you can also add a note for the driver to communicate your needs in advance. A clear, concise message can make the pickup process much smoother for both you and the driver.
Case Study: The GoGoGrandparent Solution
GoGoGrandparent has emerged as a key service for seniors seeking the convenience of ridesharing without the technological hurdles. By handling all app interactions, from booking the ride to communicating with the driver, the service empowers users who may not own or be comfortable with a smartphone. Users simply call a toll-free number and an operator arranges a ride via Uber or Lyft, specifying any mobility needs, such as space for a rollator. This makes the entire process as simple as a phone call, restoring transportation independence for many.
A simple template for your driver notes can be a great tool: “I use a folding rollator that will need to go in the trunk. I may need an extra moment to approach the car and get seated. Thank you!” This sets clear expectations and fosters a positive experience.
Why Standard 30-Inch Doors Block Access for Power Wheelchairs?
The width of a doorway is not as straightforward as a tape measure might suggest. While a standard interior door in many homes is 30 inches wide, the “effective clearance” is often significantly less. A traditional hinged door, when open, intrudes into the doorway, and the doorstop trim further narrows the passage. It’s not uncommon for a hinged door to reduce the usable opening by 2 inches or more. This means a 30-inch doorway might only offer 27-28 inches of actual pass-through space, creating a major obstacle for many mobility devices.
This is where the distinction between rollator types becomes critical. Most 3-wheel rollators, with a typical width of 21-23 inches, can navigate these tight spaces with ease. Standard 4-wheel rollators are wider, often 24-26 inches, making the fit tight but usually manageable. However, for users of standard power wheelchairs, which can be 25-30 inches wide or more, a standard 30-inch doorway often becomes a complete barrier. This spatial challenge is a primary reason why many users opt for a nimble rollator for indoor use, even if they own a power chair for outdoor mobility.
For those needing to make their homes more accessible, simple modifications like installing offset hinges can help. These special hinges swing the door completely clear of the frame, adding a crucial 1.5 to 2 inches of clearance. For wider devices, however, more significant renovations like widening the doorway may be the only solution.
The following table from an analysis by the Elder Protection Center clearly illustrates how different devices match up against a standard doorway.
| Device Type | Typical Width | 30-inch Door Clearance | Solution Options |
|---|---|---|---|
| 3-Wheel Rollator | 21-23 inches | Easily passes through | No modification needed |
| 4-Wheel Rollator | 24-26 inches | Tight fit | May need offset hinges |
| Standard Power Wheelchair | 25-30+ inches | Often blocked | Offset hinges or doorway widening |
| Bariatric Wheelchair | 30+ inches | Cannot pass | Requires renovation |
Key Takeaways
- Effective Clearance is Key: A rollator’s listed width is less important than the actual clearance of your doorways, which is often 2 inches smaller.
- 8-Inch Wheels are the Sweet Spot: They provide the best balance of outdoor stability on cracks and indoor maneuverability for mixed-use environments.
- Posture Prevents Pain: Walk inside your rollator frame with handles at wrist height to avoid the “shopping cart slump” and associated back pain.
How to Choose a Power Wheelchair Battery for All-Day Outdoor Independence?
As mobility needs evolve, some individuals may transition from a rollator to a power wheelchair to achieve greater outdoor independence. The heart of any power wheelchair is its battery system, which dictates its range, reliability, and suitability for an active lifestyle. Choosing the right battery is not just a technical decision; it’s a choice that directly impacts a user’s freedom and confidence. The manufacturer’s stated range is often based on ideal conditions, so a crucial rule of thumb is to divide the advertised range by two for real-world estimates involving hills, rough surfaces, or frequent stops and starts.
The two most common battery types are Sealed Lead Acid (SLA) and Lithium-ion. SLA batteries are the traditional, budget-friendly option. They are heavy but durable and reliable for everyday local use. In contrast, lithium-ion batteries are the modern standard for active users and frequent travelers. They are significantly lighter, offer a longer lifespan, and charge more quickly. While more expensive, their reduced weight makes the chair easier to transport, and they are generally airline-friendly, though it’s vital to check FAA regulations, as batteries must typically be under 300Wh for air travel.
For true all-day independence, especially for users who enjoy long outings, a two-battery strategy is often the best solution. This provides a backup and effectively doubles the chair’s range, eliminating “range anxiety.” Temperature also affects performance; in cold climates, battery efficiency can drop, so it’s always best to store and charge batteries indoors. Selecting a battery is about matching the technology to your lifestyle, ensuring your power wheelchair is a tool for liberation, not limitation.
Use this checklist to guide your battery selection process:
- Calculate Real-World Range: Take the manufacturer’s maximum range and halve it for a realistic estimate on varied terrain.
- Choose Your Type: Opt for SLA for affordability and local use, or select lithium-ion for lightweight travel and longer lifespan.
- Consider a Two-Battery System: This is the gold standard for all-day use and eliminating range anxiety.
- Verify Air Travel Compliance: If you plan to fly, ensure your lithium-ion batteries are under the FAA’s watt-hour limit (usually 300Wh) and you have the necessary documentation.
- Factor in Climate: Remember that cold weather reduces battery performance and plan accordingly by storing and charging indoors.
Ultimately, selecting the right mobility aid—whether a 3-wheel rollator or a power wheelchair—is a deeply personal decision. By assessing your home environment, physical capabilities, and lifestyle aspirations, you can find the perfect tool to navigate your world with safety, confidence, and independence. Evaluate your specific needs today to take the next step towards enhanced mobility.