Creating a truly accessible kitchen is not about compromise; it’s about smart, ergonomic design that enhances utility for everyone.
- The foundation of an accessible kitchen is a 34-inch counter height combined with a clearly defined knee-space envelope for seated work.
- Prioritizing side-opening ovens, pull-down shelves, and protected plumbing dramatically boosts safety and daily independence.
Recommendation: Start by analyzing and solving “Task Blockers” (impossible tasks) before addressing “Task Strainers” (painful tasks) to achieve the most impactful results first.
For many wheelchair users, the kitchen represents a daily series of frustrations. Standard countertops are too high, sinks are unreachable, and base cabinets block any hope of getting close enough to cook. The common advice often seems to be a frustrating trade-off: “just lower everything.” This one-size-fits-all approach typically leads to a massive loss of storage and creates an environment that feels compromised rather than thoughtfully designed. It ignores the fundamental truth that a functional kitchen is an ecosystem where every element, from the height of the work surface to the handle on a drawer, contributes to a seamless workflow.
But what if the key wasn’t simply lowering surfaces, but redesigning the user’s entire ergonomic experience? The solution lies in a concept we can call the Ergonomic Cascade. This design philosophy reframes accessibility not as a list of compliance checks, but as a holistic strategy that starts with the macro-environment (the layout and counters) and flows down to the micro-interactions (the tools and appliances). It’s about creating a space where independence is built into every layer of the design, from the structure of the cabinets to the choice of a can opener.
This approach moves beyond simply meeting standards; it aims to create a kitchen that is a joy to use. By focusing on smart adaptations, we can build a space that is both fully accessible and completely functional, proving that you don’t have to choose between knee space and storage. It’s about achieving both through creative, ergonomic problem-solving.
This guide will walk you through this holistic process. We’ll explore the critical dimensions that enable comfortable work, the clever retrofitting techniques that preserve storage, the appliance choices that prioritize safety, and the adaptive tools that complete the picture of true kitchen independence.
Summary: A Wheelchair User’s Guide to a Functional Kitchen
- Why 34 Inches Is the Magic Height for Seated Meal Preparation?
- How to Retrofit Existing Base Cabinets to Create Knee Space?
- Side-Opening vs. Drop-Down Oven Doors: Which Is Safer for Seated Users?
- The Drain Pipe Mistake That Blocks Wheelchair Access Under Sinks
- Where to Install Pull-Down Shelves for Maximum Independence?
- Why Grip Strength Declines Affect Cooking Safety First?
- Electric Can Openers vs. Weighted Knives: Which Solves the Bigger Pain Point?
- Which Adaptive Tools Help Arthritis Sufferers Perform Daily Tasks Pain-Free?
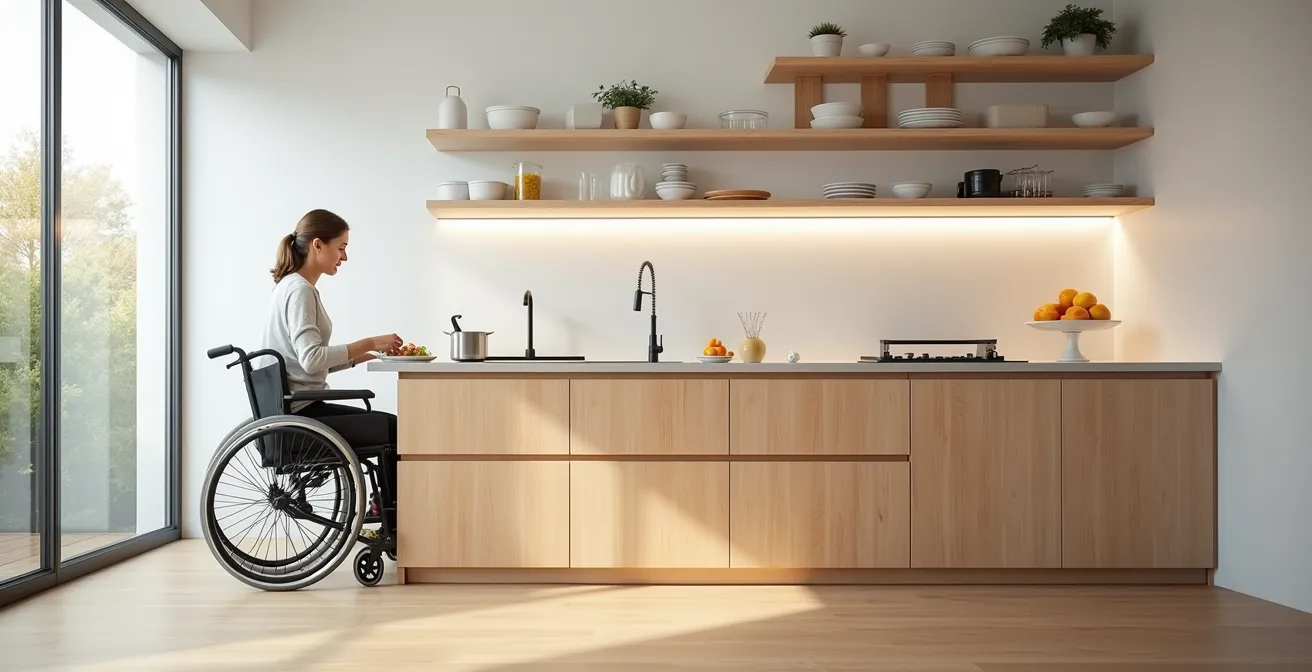
Why 34 Inches Is the Magic Height for Seated Meal Preparation?
The standard 36-inch kitchen counter height is a legacy of design for standing users, creating an immediate and significant barrier for anyone in a wheelchair. At this height, tasks like chopping, mixing, or even just placing a plate require reaching up and over, leading to strained shoulders, poor leverage, and a genuine safety risk. The solution begins with establishing a primary work surface at a more ergonomic height. While every user’s needs can vary, a height of 34 inches is widely recognized as the optimal starting point for accessible design.
This isn’t an arbitrary number. The Americans with Disabilities Act (ADA) specifies a 34-inch maximum height from the floor to the work surface for accessible kitchens. This dimension allows most wheelchair users to comfortably get their knees underneath the counter (if space is provided) and work with their arms at a natural, downward angle. This position improves control, reduces fatigue, and makes using knives and other tools significantly safer. It’s the foundational measurement of the “Ergonomic Cascade”—get this right, and every subsequent task becomes easier.
However, true ergonomic design is about personalization. While 34 inches is the compliant maximum, some users find an even lower surface more comfortable. For manual wheelchair users who may sit lower, a counter height of 30 to 32 inches can make a world of difference for tasks requiring force, like kneading dough. The ideal kitchen often includes multi-level countertops: a 34-inch primary prep area, and perhaps a lower 30-inch section for more intensive tasks or for children to use. This creates a flexible environment that adapts to the person, not the other way around.
How to Retrofit Existing Base Cabinets to Create Knee Space?
Lowering a countertop is only half the battle; without adequate knee space, the new height is useless. The most common obstacle is the standard base cabinet. A full kitchen renovation can address this, but what if you’re working with an existing layout? The good news is that you can strategically retrofit base cabinets to create a functional “knee-space envelope” without gutting the entire room. This surgical approach preserves the majority of your storage while creating crucial access points.
The process involves selecting a key work zone—typically the sink or a primary meal prep area—and removing the base cabinet in that section. This doesn’t mean leaving an unsightly hole. The countertop above must be newly supported with sturdy brackets, and the adjacent cabinets need to be finished with matching end panels to create a clean, intentional look. This modification transforms a previously blocked-off area into a functional, seated workstation.
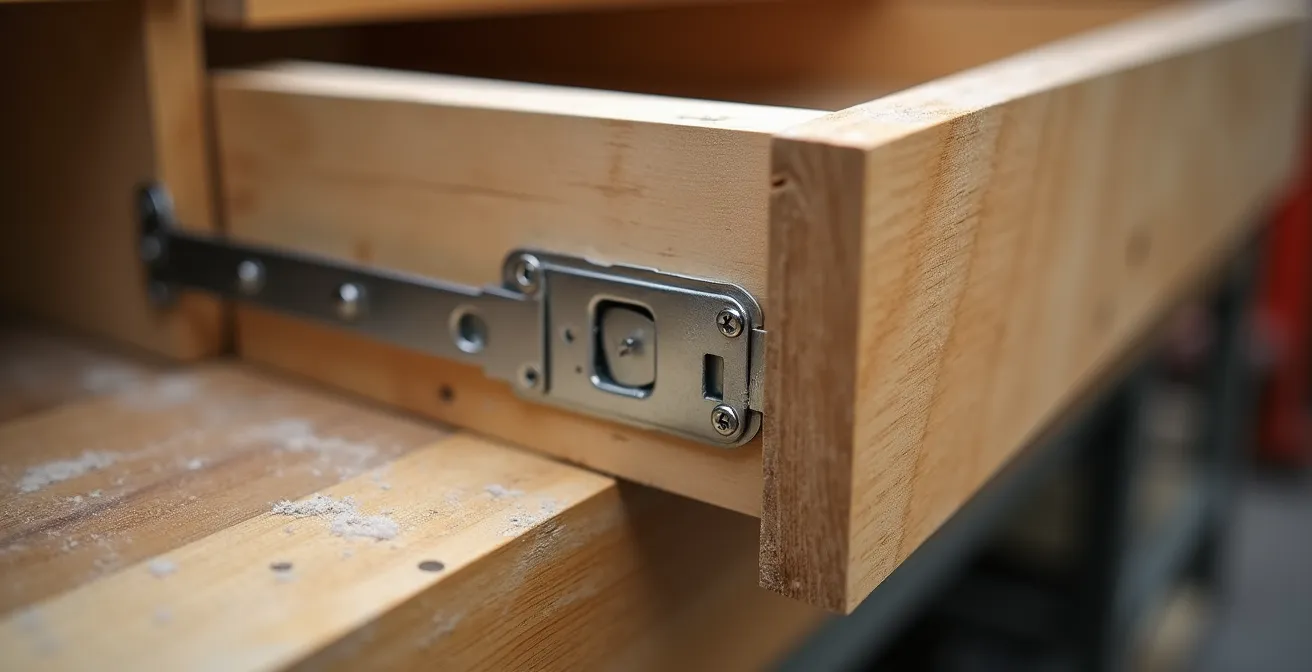
Creating this space requires precision. The knee-space envelope isn’t just a gap; it’s a three-dimensional zone with specific minimums for comfort and safety. According to guidelines for accessible cabinetry, this space must be at least 30 inches wide and 27 inches high at the front to accommodate the user and the wheelchair. Critically, it must also be at least 19 inches deep to allow the user to get close enough to the work surface without obstruction. Furthermore, providing a toe kick space that is 9 inches high and 6 inches deep allows the wheelchair’s footrests to slide underneath, enabling even closer access.
Side-Opening vs. Drop-Down Oven Doors: Which Is Safer for Seated Users?
Appliance selection is a critical step in the Ergonomic Cascade, and nowhere is the impact on safety more apparent than with the oven. A standard drop-down oven door is a significant hazard for wheelchair users. To access the hot interior, one must reach forward and over a scorching-hot door, lift a heavy dish, and pull it back over their lap. This maneuver is a recipe for serious burns and accidents. The solution lies in rethinking the oven’s design and placement entirely.
Mounting an oven in the wall, separate from the cooktop, is the first step. This allows you to place it at a height where the racks are easily accessible from a seated position. The second, and most crucial, step is choosing the right door type. A side-opening or “French door” oven is dramatically safer and more user-friendly. These doors swing out to the side, completely removing the hot barrier between the user and the oven cavity. This allows for direct, unimpeded access to the interior, making it far easier and safer to slide dishes in and out.
This isn’t just a matter of convenience; it’s a fundamental shift in safety and independence. As one expert notes, the traditional design forces a dangerous motion.
Wheelchair-accessible kitchen designs should reframe that logic by taking advantage of a separate wall-mounted oven. He likes ovens with side-hinged doors versus the traditional pull-down style that requires reaching up and pulling hot meals over one’s head.
– David L. Traut, CAPS-certified contractor, Reviewed.com
By choosing a side-hinged door, you eliminate the need to lift hot items over any obstacle. The user can roll directly alongside the oven, access the contents from the side, and transfer the dish to an adjacent countertop without risk. This single choice can be one of the most empowering adaptations in an accessible kitchen design.
The Drain Pipe Mistake That Blocks Wheelchair Access Under Sinks
You’ve successfully lowered the counter and created a knee-space envelope under the sink. Yet, when you roll up to it, you’re blocked. The culprit? A poorly placed drain pipe and P-trap assembly hanging directly where your knees need to go. This is one of the most common and frustrating oversights in accessible kitchen design. The plumbing under a sink can completely negate the benefits of an open base cabinet if not planned correctly.
The solution requires thinking about the plumbing from the very beginning. The single most effective strategy is to specify a sink with a rear-corner drain. By moving the drain from the center to the back of the sink bowl, the entire P-trap and pipe assembly is shifted backward, freeing up the critical volume of the knee-space envelope. This simple choice maximizes clearance and allows the user to get much closer to the faucet and basin, making tasks like washing dishes or filling a pot significantly easier.
Beyond placement, safety is paramount. Exposed pipes, especially hot water lines, pose a serious burn risk. It is an absolute requirement that 100% of exposed pipes must be insulated or enclosed within a protective panel. This is especially critical as some wheelchair users may have reduced sensation in their legs and might not immediately notice a burn. Proper insulation turns a potential hazard into a safe, functional space. To ensure you’re creating a truly usable under-sink area, follow a clear plan.
Your 5-Point Checklist for Maximizing Under-Sink Space
- Drain Placement: Choose a sink with a rear-corner drain to move all plumbing out of the primary knee-space zone.
- Clearance Measurement: Verify that the finished space provides a minimum of 27 inches in height and 8 inches in depth directly at the front for knees.
- Pipe Protection: Insulate or enclose all hot water and drain pipes to prevent any contact with the user’s legs.
- ADA Compliance Check: Ensure the overall knee clearance region meets ADA requirements for width (30 inches) and depth (11 inches at 9 inches high).
- Faucet Selection: Install a single-lever, hands-free, or pull-down spray faucet that can be easily operated with one hand and minimal force.
Where to Install Pull-Down Shelves for Maximum Independence?
An accessible kitchen isn’t just about what you can reach at counter level; it’s about reclaiming the full volume of the space. Upper cabinets often become dead zones for wheelchair users, holding only rarely used items. This is a massive waste of valuable real estate. The most elegant and effective solution to this problem is the pull-down shelf system. These mechanisms allow a cabinet’s entire contents to be lowered to counter height with minimal effort, bringing everything within the user’s reach radius.
These systems, which can be manual (spring-assisted) or motorized, transform upper cabinets from long-term storage into active, daily-use zones. The key to maximizing their benefit is strategic placement. They should be installed in the most frequently accessed upper cabinets, directly above primary work zones. The ideal locations are above the main meal prep counter and adjacent to the cooktop. This creates an ergonomic workflow: a user can lower the shelf to grab spices, oils, or small appliances, use them on the counter below, and then return them to the shelf without ever needing to move.
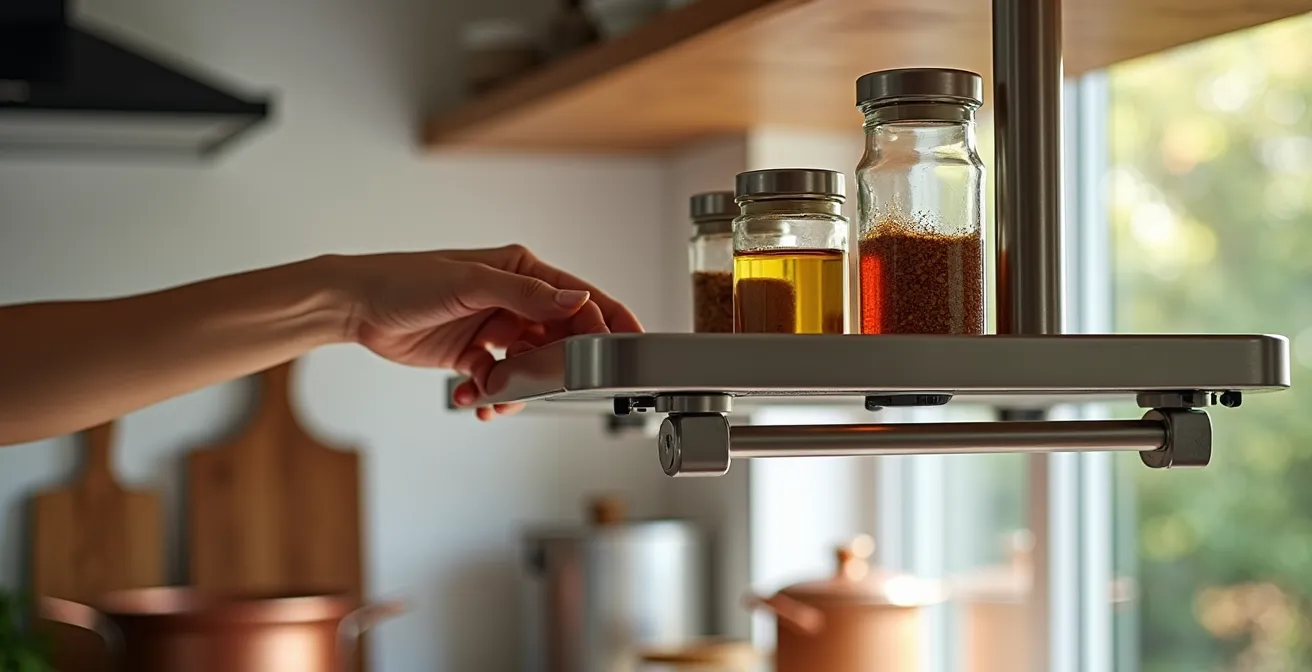
Placing a pull-down shelf above the prep area makes the entire cooking process more fluid. Ingredients are no longer stored out of sight and out of mind; they are part of an integrated, accessible system. When installed near the stove, they provide immediate access to seasonings and cooking utensils. This thoughtful placement is a prime example of the Ergonomic Cascade in action: the accessible counter below makes the work possible, and the accessible storage above makes it efficient and effortless. It’s a powerful combination that grants a new level of independence and turns the frustration of unreachable shelves into a feeling of complete control over the kitchen environment.
Why Grip Strength Declines Affect Cooking Safety First?
A perfectly designed kitchen layout is the first step, but the Ergonomic Cascade continues down to the direct interaction with appliances and tools. For many individuals, including seniors and those with conditions like arthritis, a decline in grip strength, dexterity, or hand function is the first thing to make cooking feel difficult and unsafe. A standard stove knob that requires a firm “pinch and turn” motion can become a significant barrier. Reaching over a hot cooktop to adjust controls is a clear safety hazard that is only amplified when hand strength is compromised.
This is why the design of appliance controls is not a minor detail—it’s a critical safety feature. To mitigate these risks, controls should always be located on the front or side of appliances, never at the back. This eliminates the need to reach over hot surfaces. Furthermore, controls should be operable with one hand and require minimal force. Large, easy-to-read labels, lever-style handles, and push-button or touch controls are far superior to small, tight knobs. An induction cooktop is an excellent choice, as the surface itself remains cool to the touch, drastically reducing burn risk.
The goal is to reduce the physical effort required for every task. As noted by accessibility experts, certain appliances are inherently beneficial for those with disabilities because they automate strenuous actions. Devices like automatic can openers, stand mixers, and slow cookers reduce the need for forceful gripping, twisting, or sustained effort. Choosing appliances with accessible controls and supplementing them with effort-saving gadgets addresses what we can call the “grip threshold”—the point at which a simple task becomes a safety risk. By designing for the lowest level of grip strength, you create a safer environment for everyone.
Electric Can Openers vs. Weighted Knives: Which Solves the Bigger Pain Point?
When selecting adaptive tools, it’s easy to get overwhelmed by the sheer number of gadgets available. To prioritize effectively, it’s helpful to categorize tools into two groups: those that solve “Task Blockers” and those that address “Task Strainers.” A Task Blocker is an obstacle that makes a task impossible to perform. For someone with severe arthritis or limited hand strength, using a manual can opener is often a Task Blocker. No amount of effort will succeed. In contrast, a Task Strainer makes a task painful, difficult, or fatiguing, but not impossible. Chopping vegetables with a standard knife might be a Task Strainer.
This framework makes it clear which tool solves the bigger pain point. An electric can opener is a quintessential solution for a Task Blocker. It takes a task that was impossible and makes it effortless. A weighted knife, on the other hand, primarily addresses a Task Strainer. For someone with hand tremors, the extra weight dampens the shaking, making cutting safer and more precise. For someone with arthritis, a different ergonomic handle might reduce the pain of gripping. Both are critical tools, but they solve fundamentally different problems.
The following analysis breaks down this distinction, helping you decide which type of tool to prioritize based on the specific challenge you or your loved one faces.
| Tool Type | Problem Solved | Frequency of Use | Priority Level |
|---|---|---|---|
| Electric Can Opener | Task Blocker – Makes impossible task possible | Depends on canned goods reliance | Critical for canned food users |
| Weighted Knife | Task Strainer – Reduces pain/fatigue | Multiple times daily | Critical for fresh food preparation |
| For Tremors | Weighted knife dampens tremors | Every cutting task | Primary solution for Parkinson’s |
As this comparative analysis from BraunAbility highlights, the priority depends entirely on the user’s diet and condition. If canned goods are a staple, the electric can opener is non-negotiable. If preparing fresh food is the daily goal and tremors are the main issue, the weighted knife is the most critical investment. By identifying the true “blocker,” you can make a more impactful first purchase.
Key Takeaways
- Start with the 34-Inch Standard: The foundation of an accessible kitchen is a 34-inch counter height with a dedicated, open knee-space envelope underneath.
- Prioritize Side-Access: Side-opening wall ovens and rear-drain sinks are critical safety features that remove dangerous barriers for seated users.
- Think in Layers (The Ergonomic Cascade): True accessibility comes from designing holistically, from the cabinet layout down to the choice of an electric can opener.
Which Adaptive Tools Help Arthritis Sufferers Perform Daily Tasks Pain-Free?
The final layer of the Ergonomic Cascade focuses on the specific tools that make daily kitchen tasks possible and pain-free, particularly for those with arthritis or limited dexterity. While the need for accessible homes is growing, the market for adaptive tools has exploded with innovative designs that target specific painful motions. The key is to move beyond generic “gadgets” and identify tools that eliminate the precise movements causing strain: primarily pinching, twisting, and lifting.
For someone with arthritis in their hands, a standard vegetable peeler that requires a tight pinch grip can be excruciating. A “palm peeler” that slips over a finger and is controlled by the whole hand eliminates this pain point. Similarly, twisting a tight jar lid is a common struggle. A lever-style jar opener that uses leverage instead of torsion, or an automatic jar opener, completely removes that barrier. Choosing lightweight carbon steel or two-handled pots can significantly reduce the strain of lifting, and simple sliding boards can help move heavy appliances on the counter without picking them up.
Even small hardware choices matter immensely. Round knobs on cabinets and drawers require a pinch-and-twist motion that can be difficult. Replacing them with D-shaped or bar pulls allows the user to hook their fingers or whole hand through the handle, requiring far less dexterity and strength. These small, inexpensive changes can have a massive impact on daily comfort and independence. The best approach is to categorize tools by the painful motion they eliminate:
- Tools to Eliminate Pinch Grips: Rocker knives, palm peelers, jar grippers with wide handles.
- Tools to Eliminate Twisting/Torsion: Lever jar openers, oversized knob turners, automatic can openers.
- Tools to Reduce Lifting Strain: Lightweight carbon steel pans, sliding boards, two-handled pots.
By applying the principles of the Ergonomic Cascade—from the height of your counters to the handle on your peeler—you can transform a kitchen from a place of frustration into a center of independence, creativity, and joy. The next logical step is to audit your own kitchen space, identify the most significant “Task Blocker,” and begin planning your first, most impactful adaptation.