
True independence with arthritis isn’t about the tools you buy, but how you use them to reclaim daily activities.
- Prioritize leverage over grip strength to protect small, painful joints from strain during tasks.
- Perform a task analysis to identify the exact moment of difficulty before choosing an adaptive solution.
Recommendation: Focus on mastering occupational therapy principles first; the right tools will then become obvious extensions of your strategy.
The simple act of buttoning a shirt or opening a jar of jam shouldn’t feel like a monumental task. Yet for millions living with arthritis, these daily activities become painful reminders of lost dexterity and strength. You’ve likely seen lists of “helpful gadgets,” from electric can openers to long-handled shoe horns. While these tools can be useful, simply accumulating them often fails to address the root of the problem. The real challenge isn’t just pain; it’s the risk of injury from unsafe movements and the slow erosion of confidence that comes with dependency.
But what if the secret wasn’t in the tools themselves, but in the strategy behind their use? As an occupational therapist specializing in hand function, I can tell you that genuine independence comes from understanding a few core principles—like using leverage instead of grip, conserving your energy, and modifying the task itself. An adaptive tool is not a magic fix; it is the final, crucial piece of a well-thought-out personal strategy. When you learn to think like an OT, you stop searching for a single “best” gadget and start building a system that works for you.
This guide will walk you through these foundational principles. We’ll perform a task analysis on common daily activities, from the kitchen to the laundry room, and reveal not just *which* tools can help, but *why* and *how* they work to make your life safer, more efficient, and most importantly, more independent. We will explore practical solutions that protect your joints and empower you to master daily life again, pain-free.
To help you navigate these solutions, this article is structured to address the most common challenges one by one. The following summary outlines the key areas we will cover, from ensuring safety in the kitchen to conserving energy during household chores.
Summary: A Practical Guide to Adaptive Tools and Techniques
- Why Grip Strength Declines Affect Cooking Safety First?
- How to Use a Button Hook and Zipper Pull with Trembling Hands?
- Electric Jar Openers vs. Under-Cabinet Grippers: Which Is Easier to Use?
- The Kettle Pouring Mistake That Leads to Scalding Burns
- When to Sit vs. Stand During Laundry to Conserve Energy?
- Where to Install Pull-Down Shelves for Maximum Independence?
- Why Using Leverage Instead of Grip Strength Saves Your Hands?
- Which Arthritis-Friendly Tools Actually Restore Independence in the Kitchen?
Why Grip Strength Declines Affect Cooking Safety First?
When grip strength fades due to arthritis, the kitchen is often the first place where safety becomes a serious concern. It’s not just about the frustration of being unable to open a jar; it’s about the increased risk of spills, burns, and cuts. A weakened grip makes it difficult to securely hold heavy pots, control a knife, or stabilize a mixing bowl. This inability to maintain a firm hold turns everyday cooking tasks into potential hazards, making the kitchen a focal point for immediate intervention.
The danger is compounded by a phenomenon occupational therapists call “compensatory movements.” When your fingers and hands can’t provide the necessary force, your body naturally tries to compensate by using other joints in awkward ways. You might use your wrist at a sharp angle to lift a pan or contort your shoulder to get leverage on a tight lid. Research confirms this, showing that a decrease in grip and pinch strength directly leads to these awkward compensatory patterns.
These movements are not just inefficient; they are dangerous. They place undue stress on larger joints like the wrists, elbows, and shoulders, which can exacerbate arthritic pain and lead to further injury. Furthermore, they reduce your overall stability and control. A pot held with a contorted wrist is far more likely to slip than one held with proper body mechanics. Therefore, addressing grip strength issues in the kitchen isn’t merely about convenience—it’s a critical first step in preventing accidents and preserving your long-term joint health.
How to Use a Button Hook and Zipper Pull with Trembling Hands?
For individuals with hand tremors or severe stiffness, fine motor tasks like buttoning a shirt or pulling a zipper can feel impossible. Button hooks and zipper pulls are excellent adaptive tools, but they are only effective if you can stabilize your hand enough to use them. The key isn’t brute force, but a simple occupational therapy technique called anchoring. This involves using a stable surface to brace your arm, which minimizes tremors and allows for more controlled movements.
The principle is straightforward: by fixing your forearm against a solid object, you create a stable pivot point. This transfers the work from your small, trembling hand muscles to the larger, more stable muscles of your shoulder and upper arm. You’re no longer trying to perform a delicate task with a floating, unsteady hand; you’re guiding the tool from a secure base. This technique dramatically increases accuracy and reduces the frustration associated with dressing.
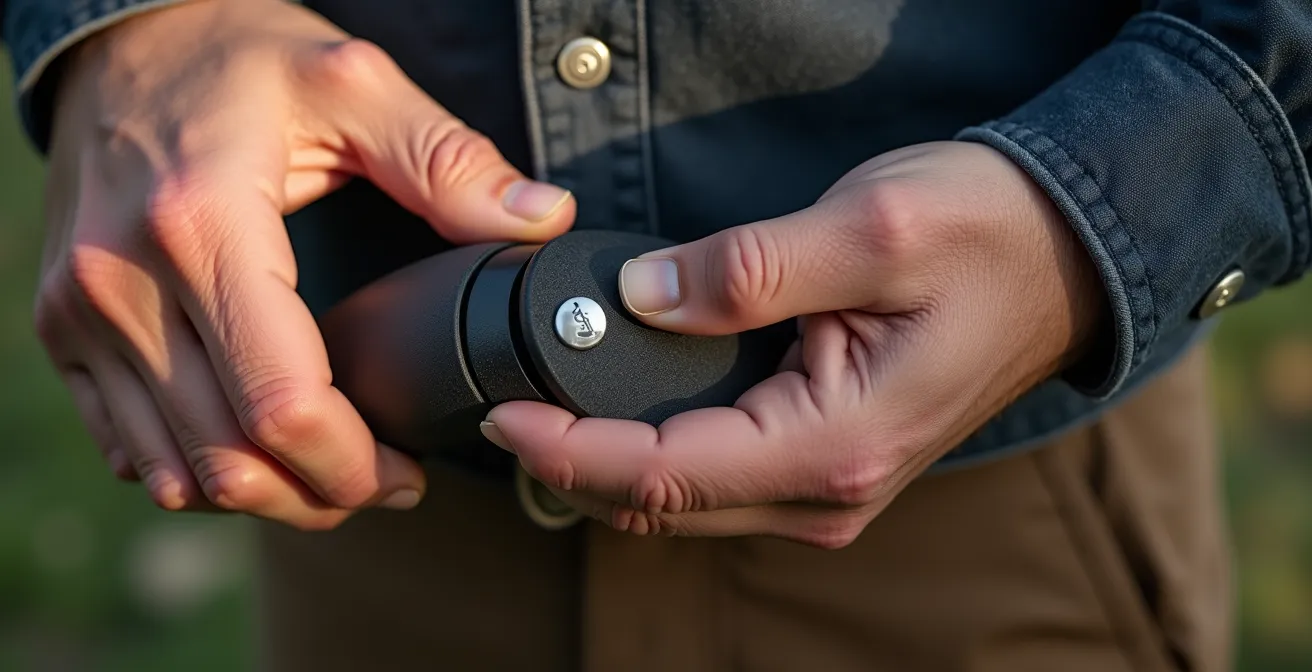
As you can see in the image, a tool with a weighted, ergonomic handle can further help dampen tremors. To use it effectively, position yourself comfortably and find a surface to brace against. A dresser, a wall, or even the back of a sturdy chair works well. Once your arm is anchored, you can guide the hook or pull with slow, deliberate motions originating from your shoulder, not your wrist. This technique transforms a frustrating chore into a manageable and independent activity.
Your Action Plan: The Anchoring Technique for Tremor Control
- Position Yourself: Stand or sit in front of a stable, fixed surface like a dresser, countertop, or wall.
- Brace Your Forearm: Press your forearm (the one holding the tool) firmly against the surface to create a solid, unmoving base.
- Guide the Tool: Use this stabilized position to guide the button hook or zipper pull with controlled movements. Don’t try to “aim” with your hand.
- Use Your Shoulder: Focus on making the primary movement come from your shoulder joint rather than your wrist or fingers for better control and less fatigue.
Electric Jar Openers vs. Under-Cabinet Grippers: Which Is Easier to Use?
Opening a tight jar is a classic challenge for anyone with arthritis. The solution is not a one-size-fits-all gadget but a choice between two excellent options: electric openers and under-cabinet grippers. The “easier” tool depends entirely on your specific needs, hand strength, and kitchen layout. An electric opener offers complete, push-button automation, while an under-cabinet gripper uses leverage to amplify your own strength. A task analysis of your abilities and environment is crucial to making the right choice.
Electric jar openers are the ultimate solution for those with very limited or no grip strength. They require zero twisting or clamping force from the user. You simply place the jar, press a button, and the machine does all the work. This makes them ideal for ensuring full independence. However, they do take up valuable counter or cabinet space and are typically limited to a specific range of jar sizes. They are also the more expensive option.
Under-cabinet grippers are a more minimalist and affordable solution. These devices mount discreetly under a cabinet and feature a V-shaped set of metal teeth. To use one, you wedge the jar lid into the “V” and turn the jar with both hands, using your body’s strength and leverage rather than your grip. This requires some hand and arm strength but far less than opening a jar unaided. It’s an excellent choice for those who still have some functional strength and want to conserve counter space.
The following comparison table breaks down the key differences, drawing on data from an analysis of self-help arthritis devices to help you decide which tool best fits your personal “energy economy” and independence goals.
| Feature | Electric Jar Opener | Under-Cabinet Gripper |
|---|---|---|
| Hand Strength Required | None (push-button) | Some (body leverage needed) |
| Counter Space | Moderate footprint | None (mounted) |
| One-Handed Operation | Yes | Partial |
| Jar Size Range | Limited by device size | More versatile |
| Cost | $40-150 | $15-40 |
| Independence Level | Full independence | Assisted independence |
The Kettle Pouring Mistake That Leads to Scalding Burns
The most common and dangerous kettle pouring mistake is attempting to lift and pour with a full kettle using only wrist and hand strength. For someone with arthritis, this is a recipe for disaster. A full kettle is surprisingly heavy, and the combination of weight, a weak grip, and the need for precise control creates a high risk of spills and severe scalding burns. The mistake is not in the pouring motion itself, but in the initial act of lifting the heavy, water-filled vessel.
The physics are simple but stark. As physics research shows, a full 1.7L kettle can weigh over 2kg (4.5lbs). Attempting to lift and control this weight with painful, weakened joints is not only difficult but also biomechanically unsound. It forces the small joints of the hand and wrist to bear a load they are not designed for, leading to a loss of control. The moment the kettle slips, a scalding injury is almost inevitable. This makes it one of the most critical safety issues to address in the kitchen.
The solution is to eliminate the lift-and-pour motion entirely. One excellent adaptation is a kettle tipper. This is a simple cradle that holds the kettle securely, allowing you to tip it and pour by applying light pressure to a handle, using leverage instead of lifting strength. This device keeps the weight of the kettle supported on the counter at all times, removing the risk of dropping it. For those seeking a more integrated solution, an instant hot water dispenser represents the gold standard. It delivers boiling water at the touch of a button, offering a “zero-lift, zero-pour” method that completely removes the kettle from the equation, maximizing safety and independence.
When to Sit vs. Stand During Laundry to Conserve Energy?
Managing a chronic condition like arthritis requires budgeting your energy throughout the day, a concept occupational therapists call energy conservation or building an “energy economy.” Laundry is a surprisingly demanding chore involving multiple steps of lifting, carrying, bending, and reaching. The key to completing it without exhaustion or pain is to strategically alternate between sitting and standing. You should sit for any task that is stationary and can be brought to you, and stand only for brief, transitional movements.
A smart laundry routine begins with a task analysis. Break the entire process down: sorting, loading, transferring, folding, and putting away. Tasks like sorting clothes into piles or folding an entire load are static activities that can easily be done while seated at a table. This simple change saves an enormous amount of energy that would otherwise be spent standing. Conversely, tasks like moving wet clothes from the washer to the dryer are quick, dynamic actions that are more efficiently done while standing for a short period.

The goal is to create an ergonomic workflow. As shown in the image, using a rolling laundry cart eliminates the need to carry heavy baskets, which is one of the most strenuous parts of the job. A perching stool can also be a valuable tool, allowing you to rest in a supported semi-standing position during brief pauses. By consciously deciding when to sit versus stand, you transform laundry from a single, exhausting marathon into a series of manageable, energy-efficient steps.
Here is a simple routine based on energy conservation principles:
- SIT: Sort all clothes into piles on the floor or a low table before starting.
- STAND: Transfer clothes from the washer to the dryer (a brief, 30-second task).
- SIT: Fold the entire load of dry laundry at a comfortable, table-height surface.
- SIT: Pair and organize all socks—a classic seated task.
- STAND: Briefly stand to hang items on a low rod or hooks, minimizing overhead reaching.
- Use a rolling laundry cart to move clothes between stations, eliminating all carrying.
Where to Install Pull-Down Shelves for Maximum Independence?
Pull-down shelves are a transformative kitchen adaptation, but their effectiveness hinges entirely on their placement. They should be installed in the upper cabinets that you need to access most frequently, specifically for lightweight but essential items like spices, glasses, mugs, and breakfast cereals. The goal is to bring your most-used items down into your “power zone”—the area between your shoulder and waist height—eliminating the need for risky reaching or stretching, which can strain joints and compromise balance.
Think of your kitchen cabinets in terms of frequency of use. The items you use daily or multiple times a day should be the most accessible. Placing a pull-down shelf in a rarely used cabinet is a waste of a powerful tool. Instead, identify the cabinet directly above your primary food preparation area. This is likely where you store spices, oils, and small utensils. Installing a pull-down shelf here means you can bring all those items down to counter level with a single, gentle pull, use what you need, and then guide the shelf back up. This is a classic example of an environmental modification designed to promote independent functioning.
The concept of modifying your environment is a cornerstone of occupational therapy for arthritis management. It’s about making your space work for your body, not forcing your body to adapt to an inconvenient space. As experts from the Canadian Medical Association point out, simple changes can have a profound impact on independence.
Environmental modifications may be necessary to promote independent functioning. For example, a grab rail fixed to the wall or bathtub can facilitate entry and exit from the tub. The toilet is often the lowest seat in the house and may be difficult for patients with hip or knee problems to use; a raised toilet seat may mean the difference between independence and institutional care for some patients.
– Canadian Medical Association, Rheumatology: Physical and occupational therapy in arthritis management
Just like a raised toilet seat, a strategically placed pull-down shelf can be the key to maintaining self-sufficiency in the kitchen. By placing it where you need it most, you are not just adding a convenience; you are redesigning your environment for safety and independence.
Why Using Leverage Instead of Grip Strength Saves Your Hands?
Using leverage instead of grip strength is the single most important principle for protecting your hands from arthritic pain and damage. Grip-intensive actions, like pinching or tightly holding an object, concentrate immense force onto the small, delicate joints of your fingers and thumb. Over time, this repeated stress causes inflammation, pain, and joint degradation. Leverage, on the other hand, is a technique that shifts this force away from your fingers and onto larger, more robust muscle groups and joints like your palm, forearm, shoulder, or even your body weight.
Think of your joints as having a daily budget for stress. Every time you pinch a key to turn it or grip a knife handle tightly, you make a big withdrawal. By using leverage, you make tiny withdrawals instead, preserving your “joint capital” for the long term. Occupational therapists specialize in teaching these modified techniques. Instead of seeing a task as a challenge of strength, they re-frame it as a puzzle of physics. The goal is always to find a way to use a longer lever or a larger surface area to do the work, which mechanically reduces the force required from your hands.
This principle can be applied to countless daily activities. Pushing a door open with your forearm or hip instead of pulling the handle with your fingers is a perfect example. Using the heel of your hand to press down on a pump-top soap dispenser instead of squeezing a bottle is another. These may seem like small changes, but compounded over a day, a week, or a lifetime, they dramatically reduce the cumulative strain on your hands. It’s a fundamental shift in thinking: from a mindset of force to a mindset of smart mechanics.
Your Action Plan: Three Leverage Techniques to Protect Joints
- Carry Plates from Underneath: Instead of pinching the rim with your fingers, slide the plate onto your flat palm and support it with your forearm. This distributes the weight across your entire arm.
- Push Doors with Your Body: Use your forearm, shoulder, or hip to push doors open rather than pulling handles with your fingers. This engages large, powerful muscles.
- Use the Heel of Your Hand: For tasks like using a rocker knife or pressing down on a spray bottle, use the heel of your hand. This engages your arm and shoulder muscles, completely bypassing your finger joints.
Key Takeaways
- Leverage is your most powerful tool. Always use your body, forearm, or the heel of your hand instead of pinching with your fingers to distribute force away from small joints.
- Safety is paramount. A full kettle or a slippery jar poses a significant risk. Prioritize solutions that eliminate lifting and twisting to prevent burns and injuries.
- Energy is a finite resource. Use task analysis to identify where you can sit, use rolling carts, or modify your environment to build an “energy economy” for your day.
Which Arthritis-Friendly Tools Actually Restore Independence in the Kitchen?
The most effective arthritis-friendly tools are not necessarily the most high-tech or expensive ones. They are the tools strategically chosen to solve a specific problem by applying the principles of leverage, energy conservation, and joint protection. A truly independent kitchen is one where every tool has a purpose: to eliminate a painful motion, reduce required force, or make a task safer. Rather than buying every gadget available, start with a core “starter kit” of five tools that address the most common kitchen challenges.
This curated set of tools is designed to work together to minimize strain on your hands. A high-quality rocker knife, for example, changes the act of chopping from a grip-intensive task to one that uses gentle downward pressure from your entire arm. A push-button electric can opener completely eliminates the difficult gripping and twisting motions that are a major source of pain. These tools aren’t just conveniences; they are prescriptions for specific biomechanical problems.
The “Big Five” starter kit for maximum kitchen independence includes:
- High-quality rocker knife: Changes the grip to distribute force over the entire hand, not the fingers.
- Push-button electric can opener: Eliminates gripping and twisting motions entirely.
- Built-up handle utensils: Reduces joint strain with larger diameter grips that require less pinch force.
- Silicone jar gripper: Provides superior friction for opening jars without requiring a strong grip.
- Lightweight pot/pan with dual handles: Distributes weight across both hands and arms, making lifting safer and easier.
Ultimately, the goal is to develop self-management skills. An occupational therapist can help you analyze your unique challenges and create a plan. As expert OT Carole Dodge explains, this proactive approach is key.
An occupational therapist is a specialist who helps people with arthritis maximize their ability to participate in activities safely. The sooner you start working with an OT, the more you can benefit. The first visit typically involves learning what activities they engage in, particularly anything difficult because of arthritis. The OT creates an appropriate plan to address all issues with the goal to teach self-management skills as much as possible.
– Carole Dodge, OT, University of Michigan Health System
To apply these principles effectively, the next step is to conduct a personal task analysis of your own daily routine. Identify your specific challenges, start with the core principles of leverage and safety, and then select the adaptive tools that will best empower your independence.